There are plenty of great web apps out there designed to help you manage projects, centralize resources, collaborate with team members, etc.
Some that come to mind include:
Now I’ll admit that I love playing with these different applications and getting a feel for which ones work best (and for what reasons). But the mix of not-quite-right features and monthly subscription costs can quickly add up. This is especially true for hobby projects.
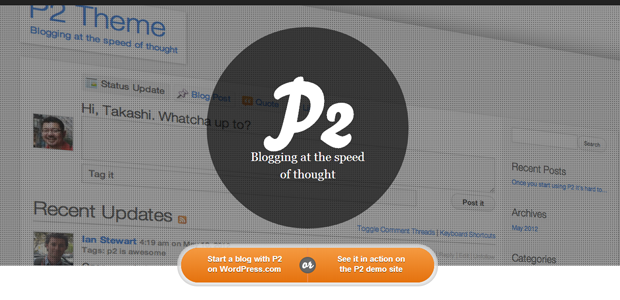
That got me thinking about what was possible with WordPress. It’s well known that Automattic relies on a multitude of WordPress sites running the P2 theme. P2-powered WordPress blogs are also used by the WordPress.org teams to manage and track discussions.
Clearly something is working there. So why don’t we give it a shot?
The Goal
Michael Wender has a great post on how he uses P2 to keep his clients up-to-date with their WordPress projects. He makes solid points, but I have two concerns about his approach:
- Everything is public. Transparency is nice and all, but I’d be worried about clients sharing information on the site.
- Everything is tied to a single blog installation, using tags to sort projects. I’m a bit OCD about keeping projects separated from one another.
We’re going to take a different approach. Specifically:
- Every client will have a separate site.
- Each site will be locked down. Capabilities will be restricted and only users will have access.
The objective here is to create something that is both secure and private.
The Ingredients
- A web host that can run WordPress.
- The latest version of WordPress.
- P2 theme from Automattic.
- The following plugins:
- SSL Certificate (Optional)
- Separate service for storing/sharing files.
Part 1: Getting Things Prepared
1.) Install WordPress.
- If you’re an agency or freelancer, I suggest setting up a subdomain, e.g. projects.yourdomain.com. This keeps things on-brand.
2.) Enable Multisite.
- Follow the steps in Create a Network on the WordPress Codex.
- I recommend using the subdirectory option. The DNS configuration is less fussy that way.
3.) Install the Members plugin.
We want to lock down this site from the get-go:
- Install the Members plugin and activate it for the network.
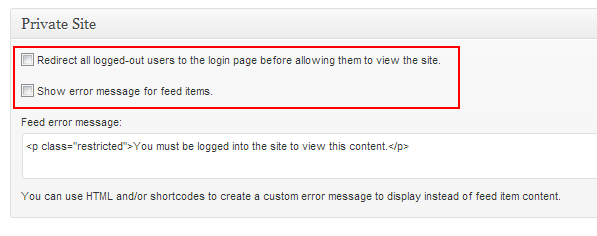
- Go to your main network blog. Under Settings, click Members.
- Under Private Site, check the Redirect All Users and Show error message for feed items.
- Click Update Settings.
Now, whenever someone tries to access the site, they’ll need to log in first.
4.) Install the P2 theme.
- From your Network Admin section, go to Themes – Add New.
- Look for P2 from Automattic. (Should be the 1st result.) Click Install Now.
- Click Network Enable.
5.) Install the P2 plugins.
These are some fine, fine plugins that add functionality to P2:
- Who’s Online displays a sidebar widget letting you know which users are currently logged into the site.
- The P2 Check In plugin lets users check into the site, and displays how long they’ve been checked in for. Useful for real-time collaboration on pages, separating those who are participating (checked in) from those who are just observing (online, but not checked in).
- P2 Likes adds the equivalent of upvoting/+1 voting to individual posts and comments.
- P2 by Email is useful for two reasons: Firstly, it gives you more email notifications than what P2 offers by default. It also lets you submit posts, reply to posts, and reply to comments via email.
- P2 Resolved Posts is simple – it lets you mark posts as Resolved or Unresolved. Used in combination with smart categorization and tagging, this adds a task management/bug tracking component to your site.
Install and Network Activate these plugins. They’ll kick your P2 capabilities up a notch.
BAM!
6.) Install a backup plugin.
If you’re going to invest in anything, invest in a good backup plugin. It’s like insurance for your site.
Since this entire network setup is intended to hold discussions and documentation related to your projects, you better believe that this is worth the cost!
Backup Buddy from iThemes is a solid choice, and one we swear by.
7.) Install the Custom Login plugin.
By customizing your login screen, you can create a custom-branded experience for your clients. Is it a little detail? Absolutely. But those little details add up in the long run!
Install the Custom Login plugin and Network Activate it.
8.) Install the Blog Copier plugin.
The handy-dandy Blog Copier plugin allows you to easily copy blogs within a multisite network.
Install the plugin and Network Activate it.
9.) Set up a separate service for storing/sharing files.
While WordPress is great at many things, it’s not a replacement for secured file sharing services like SharePoint, SkyDrive, Google Drive, Dropbox, Box, etc.
The solution we’re building is focused on communication and collaboration, not secure file storage.
That said, I recommend using one of the services above for storing files and assets, and then linking to them from your project’s P2 blog.
Optional: 10.) Add SSL to your (sub)domain.
Securing and encrypting connections to your project sites adds another level of polish and professionalism. It’s not absolutely necessary, but again, it’s one of those details that help boost your credibility:
Next Week: Creating the P2 Project Site Template
This week’s post focused on getting all of the essential stuff set up.
Next week we’re going to dive into pulling these different components together.
Until then, here’s Michele Mizejewski talking about P2 at WordCamp San Francisco 2013: