This is part our series on organizing WordCamps. Check out Getting Involved: WordCamp Organizing 101 for the full series. If you’re an organizer with advice to share, or a potential organizer with questions to ask, please get in touch with us!
“We’ll give you an official WordCamp email address and website. Register a Twitter account using your official email address. Your WordCamp website comes with some *awesome* tools — check them out!” – WordCamp Planning Guide
Your WordCamp site serves a few purposes:
It’s your first impression.
Potential sponsors and attendees will be looking at your site to get a feel for what the event is all about. If they’ve never sponsored or attended a WordCamp before, you’ll also need to educate them. 🙂
It’s your primary means of communication.
Your site is the go-to source of information before the event, during the event, and after the event. Everything else — Facebook, Twitter, Google Plus, whatever — is secondary.
It’s your legacy.
After your WordCamp is over, the site becomes an archive of the event. People can (and will) come back to the site, years down the road, to read about what took place during your WordCamp.
Ground Rules
There are a few things you should know:
Your site must be on the WordCamp.org network.
While you may have another domain that’s easier to remember, it should redirect to the official WordCamp site (year.city.wordcamp.org).
You can’t install plugins.
Luckily the WordCamp.org sites do run Jetpack, so there’s a lot of functionality you can still take advantage of. However, you can request WordCamp Central to add a plugin if you need it.
You can’t install themes.
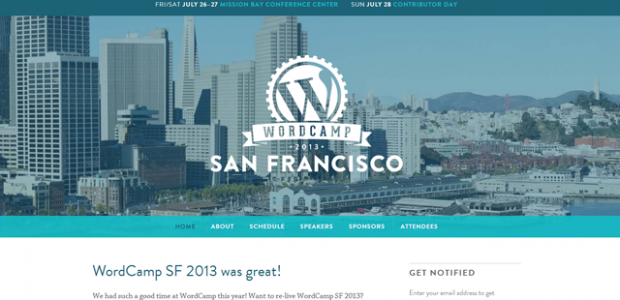
Your design freedom will be limited to whatever you can pull off using the available theme options and custom CSS. Even the WordCamp San Francisco 2013 site uses a customized version of Twenty Twelve.
Site Structure
The sitemap we follow is fairly standard. You don’t need to stick to it, of course, but you should try to cover as much of this information as you can:
Welcome Page: The abridged one-pager for your event.
- What’s a WordCamp? What’s your WordCamp all about?
- Who should attend, and why?
- Where is the event taking place?
- When is the event taking place?
- How much does it cost?
About Page: Behind-the-scenes stuff.
- Who are your organizers, and what do they do?
- Who are your volunteers?
Contact Us
- Contact form.
- Links to social media.
- Additional contact details, if any.
Location/Venue
- Address of the venue.
- Information on parking and transit.
- Driving and transit directions.
- Map of the area surrounding the venue.
- Floorplan (make a separate PDF or something that people can print out).
Accommodations
- If you have a special rate with a nearby hotel — and try to get one, if you can! — get that info on your site.
Get Involved/Volunteers
- Information on volunteering.
- List of volunteers.
- We use a Google form to take volunteer applications.
- Web badges or other promotional stuff people can share online.
Speakers/Presenters
- Information on presenting.
- We use a Google form to take in speaker applications.
- List of speakers. (Use the built-in Speakers custom post type!)
- List of sessions. (Again, use the built-in post type.)
- Schedule. A bit fussy if you use tables, but worth it.
- Presentations page for after the event.
Sponsors
- Information on sponsorships (prices and what they get in return).
- Again, we use a Google form for interested sponsors to apply.
- Use the Sponsors post type.
Registration
- Ticket pricing, refund policy.
Ongoing Content (aka Blogging n’ Updates)
I love this stuff! 🙂 Keep your WordCamp site up-to-date as details are confirmed. This reassures folks that, yes, things are happening.
Here are some ideas for regular posts:
- Announcements when new pages are added to the site.
- Announcements when speakers are confirmed.
- Behind-the-scenes updates from organizer/volunteer meetings.
- Shout-outs to other WordCamps in your region.
- A Q&A with every speaker, sponsor, volunteer, and organizer. Each Q&A gets its own post. (We use a Google form to streamline the Q&A, and a category to track the posts.)
- Guest posts from speakers or sponsors.
How can you take the content even further?
- Write weekly summaries of all new content posted to the site.
- Put these summaries in a category, then hook that category’s RSS feed into an RSS-Driven Campaign in MailChimp that people can subscribe to.
- Use Publicize to automatically syndicate posts to your event’s social media profiles.
A bit of advice: try to designate a day when you can prep posts for the entire week. For example, scheduling your daily “Featured Speaker” posts in advance will give you some much-needed buffer time. A bigger buffer means less stress!
Lastly, bookmark the Web Presence section in the WordCamp Planning Guide. There’s a lot of useful information there that’ll come in handy as you build up your WordCamp site, particularly the shortcodes. 🙂