Organization is key in maintaining content control on your blog, and the best way to do that is create an editorial calendar. The Editorial Calendar plugin is a great way to make sure you keep your content on schedule. Here are the steps to help you download it:
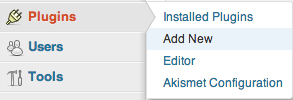
Start by hovering over the ‘Plugins’ button and clicking ‘Add New’:
In the search bar, enter ‘calendar’ and hit ‘Search Plugins’:

The Editorial Calendar is the one with the highest star rating. This is the one you want to install.
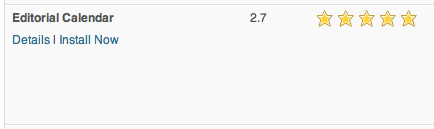
Click ‘Install Now’:
![]()
You will be asked if you are sure you want to install. Click ‘OK’:

When the plugin is successfully installed, you will see this message:

Click ‘Activate Plugin’:
![]()
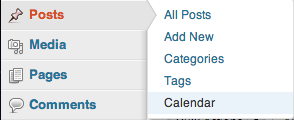
You will find your Editorial Calendar when you hover over ‘Posts’. To see the calendar click ‘Calendar’:
This will bring you to your full monthly calendar. In order to schedule a post, hover over the desired date. This will show you the ‘New Post’ option. Click it:

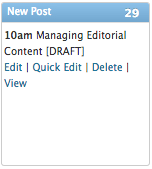
There you will see this window pop up. Fill it in with the post information:
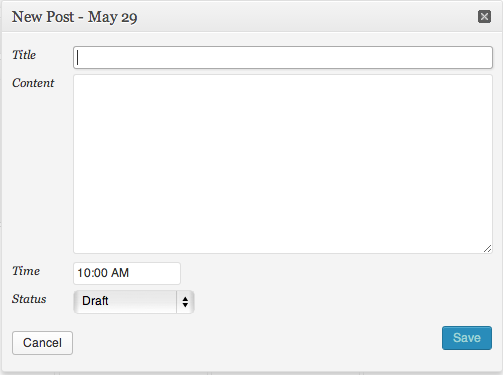
Then click ‘Save’:
![]()
Now, the post name will show on the full monthly calendar. If you want to edit it, hover over the date. This will show you the post options:
Following these steps will give you content control with a visual representation of your editorial schedule within WordPress.